
~ Transforming Rocks into Polished Spheres ~
This blog narrates my journey of transforming raw rocks into polished spheres while overcoming challenges and embracing the art of lapidary. Spheres have captivated humans for centuries! We are surrounded by them – from the spherical disc in the middle of a flower to bouncy balls, planets and waterdrops. Not surprisingly, spheres are also featured frequently in the gem and jewellery industry. A great example is the royal coronation orb.
The process of crafting spheres by hand in a workshop is an intricate and time-consuming process, even when accurate machining is involved. As a passionate lapidarist, I was recently approached by a prominent West Australian copper/gold mining company with a unique proposition – to transform rough-sawn slabs comprised of malachite, chrysocolla, and jasper minerals into exquisite 75mm spheres.
Turning rocks into spheres: unveiling the hidden beauty
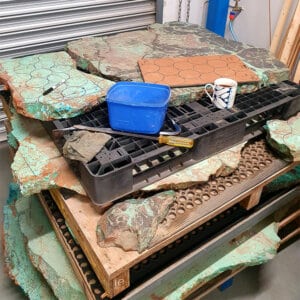
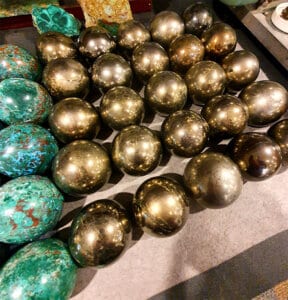
This WA copper/gold mining company had these rough-sawn slabs of malachite/chrysocolla/jasper minerals, lying around in their industrial yard in a northern suburb of Perth. These slabs were large – 1.5m x 1.2m and approximately 47mm thick. They also weighed about 200kg each!
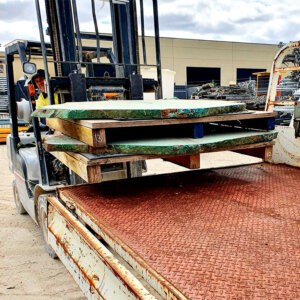

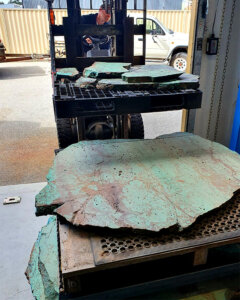
Although these slabs were weathered and had significant cracks throughout, it was advantageous as they could be worked more easily. I reasoned that two pre-drilled 85mm diameter pieces could be glued together to make a 75mm sphere (on the proviso the halves matched each other in colour and patterning).
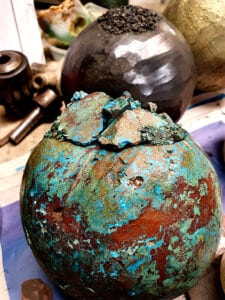
Despite initial outer appearances, it became clear that the weathered, diamond-wire-saw cut surfaces gave little insight into the quality of the ore internally or of the patterning within. Their high quality and internal patterning were eventually revealed through the process. The result was beautiful spheres boasting a lustrous polish. I proceeded to make a few samples and presented them to the mining company representatives.
Turning rocks into spheres: meeting tight deadlines
Impressed by the samples, they expanded the initial order from 30 to 200 spheres, along with an additional order for 15 larger spheres of 125mm diameter. All of this work was required by early September 2022, just five months from the initial order placement. So, it was all hands on deck!
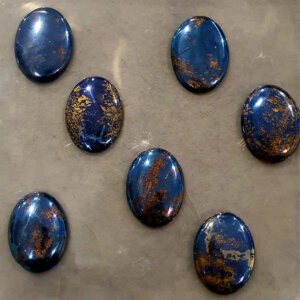
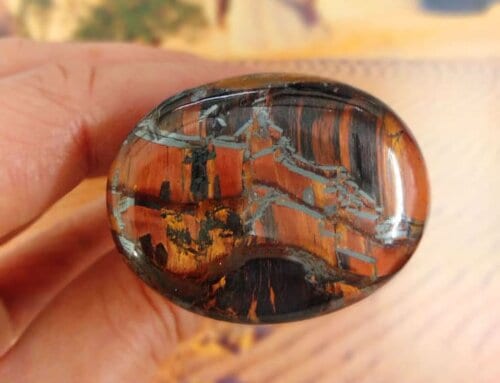
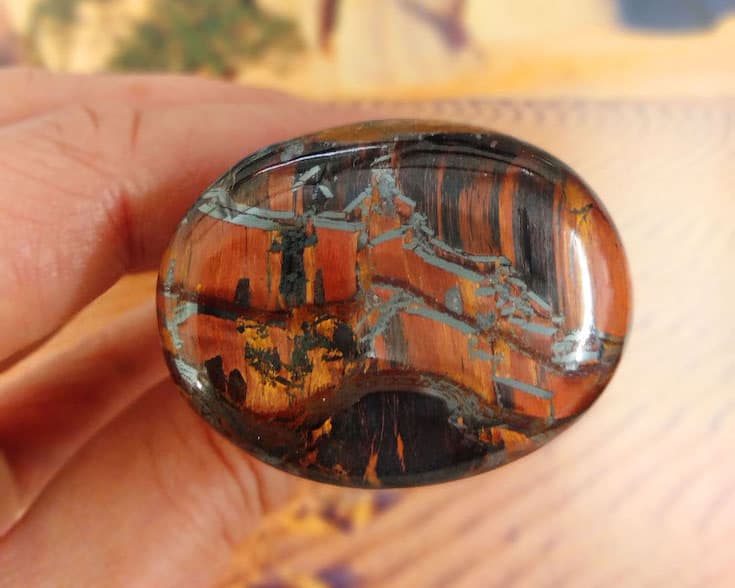
My scheduling for this project was blown out less than a week later when I received another phone call from the mine site increasing the order to 330 spheres and 60 pendants of peacock ore cabochons set in Stirling silver.

The completion date had to be amended to encompass this much bigger order. I asked my brother to help me, and his work was invaluable (more on that later!). Not only did I have to prioritise this project above all else, but any new work orders had to be carefully vetted. Consequently, a number of work orders had to be turned away to ensure I could focus on delivering the spheres promptly.
Turning rocks into spheres: crafting exquisite packaging
To enhance the presentation of the spheres, I decided to include the following items in my quote for the job:
- An acrylic base with a support ring (to hold the sphere in place)
- Meticulously handcrafted black heavy cardboard box
- Foam inserts to ensure secure transportation
- An engraved company logo featured on each box
These items were outsourced to external contractors. Expanding the scope of the order required coordinating with contractors and communicating the updated requirements. Fortunately, the contractors were accommodating and ready to meet the increased demand.
Turning rocks into spheres: navigating supply chain challenges
While the 1200kg rough slabs of malachite/chrysocolla/jasper were now in my workshop, the ‘peacock ore’ sulphide material for the additional order was still located 1000km away on the mine site. Supply chain issues, compounded by Covid-related slowdowns, added further complications. Adding to my anxiety was my order of essential core drilling equipment which had not arrived despite the tireless efforts of my local import agent.

There were a few key lessons that I have learned:
- To process large orders seamlessly, at least three pieces of all essential equipment (consumables) need to be on hand before starting. For example, one diamond core drill bit with two in reserve was just adequate. However, two more were essential to maintain the continuity of production.
- Shopping local or nationally, rather than relying on overseas suppliers for consumables. Fortunately, I found one in Melbourne (still 3600km away). These Melburnians were superb with a six-day turnaround from order confirmation to delivery door-to-door.
- For specialised equipment, I ultimately sought out a reliable manufacturer in northern Europe, despite the longer turnaround time (a refreshing 5 weeks from confirmation of order!). The exceptional quality in their manufacturing, a low wear rate and reasonable price points made it worth the wait!
The whole sphere fabrication experience was worth the sleepless nights just to find these two outstanding manufacturing connections.
Turning rocks into spheres: precision drilling and cutting
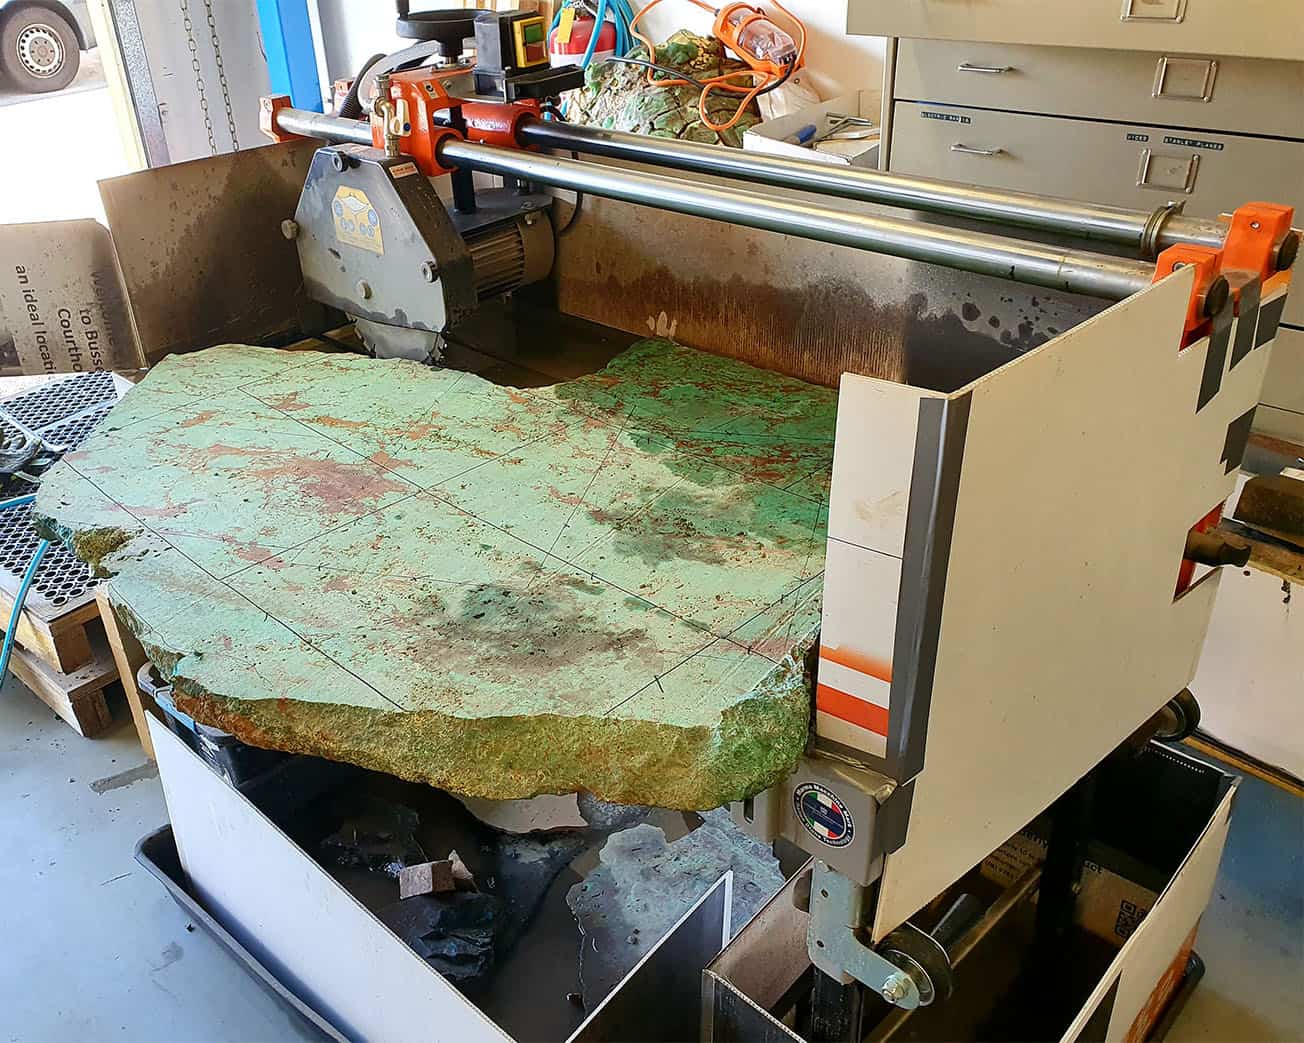
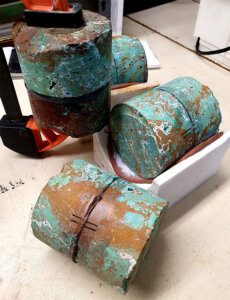
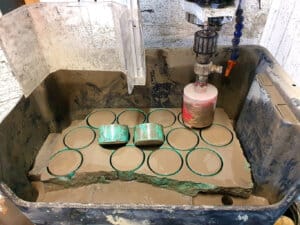
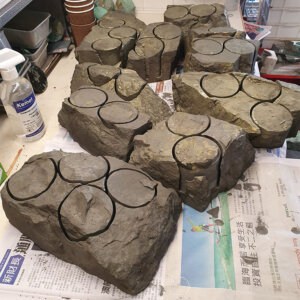
Each malachite/chrysocolla/jasper sphere required two 85mm diameter pieces. This meant that 440 pieces needed to be drilled out with 10% more, for contingencies. I carefully marked out the 200kg slabs into manageable rectangles to fit into the 25mm thick marine plywood container bolted onto the Drill Mill’s XY table. (with enough finger room to get them out again after drilling)
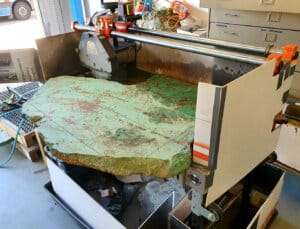
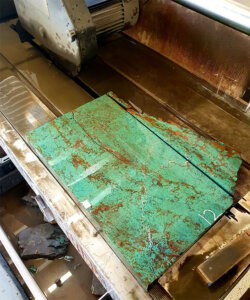
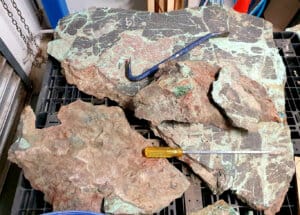
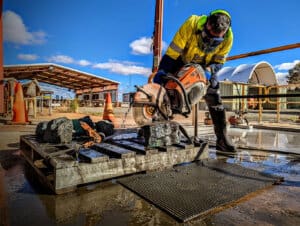
Each rectangle had 13-15 circles marked on them depending on the structural integrity to deliver solid preforms. The rectangles were cut from the larger slabs using a specialised Italian overhead diamond saw. This machine performed superbly with minimal chipping or blowouts. The preparation of the rectangular blocks was perhaps the most rewarding part and definitely the easiest to perform. Some of these newly sawn surfaces showed wonderful surprises where the chrysocolla voids were coated with fine drusy quartz. None of this was evident on the weathered slabs prior to drilling.
To be able to cookie-cut up to 15 preforms from each rectangle and witness the colour and patterning they displayed was quite memorable. However, they chewed up and often broke the drill bit ‘teeth’. With practice, this got better – drilling times improved with fewer broken and jammed preforms. Over time, I honed my skills and became proficient in brazing broken diamond segments (‘teeth’) back into place with correct spacing. Brazing required several stages and took time to do correctly.
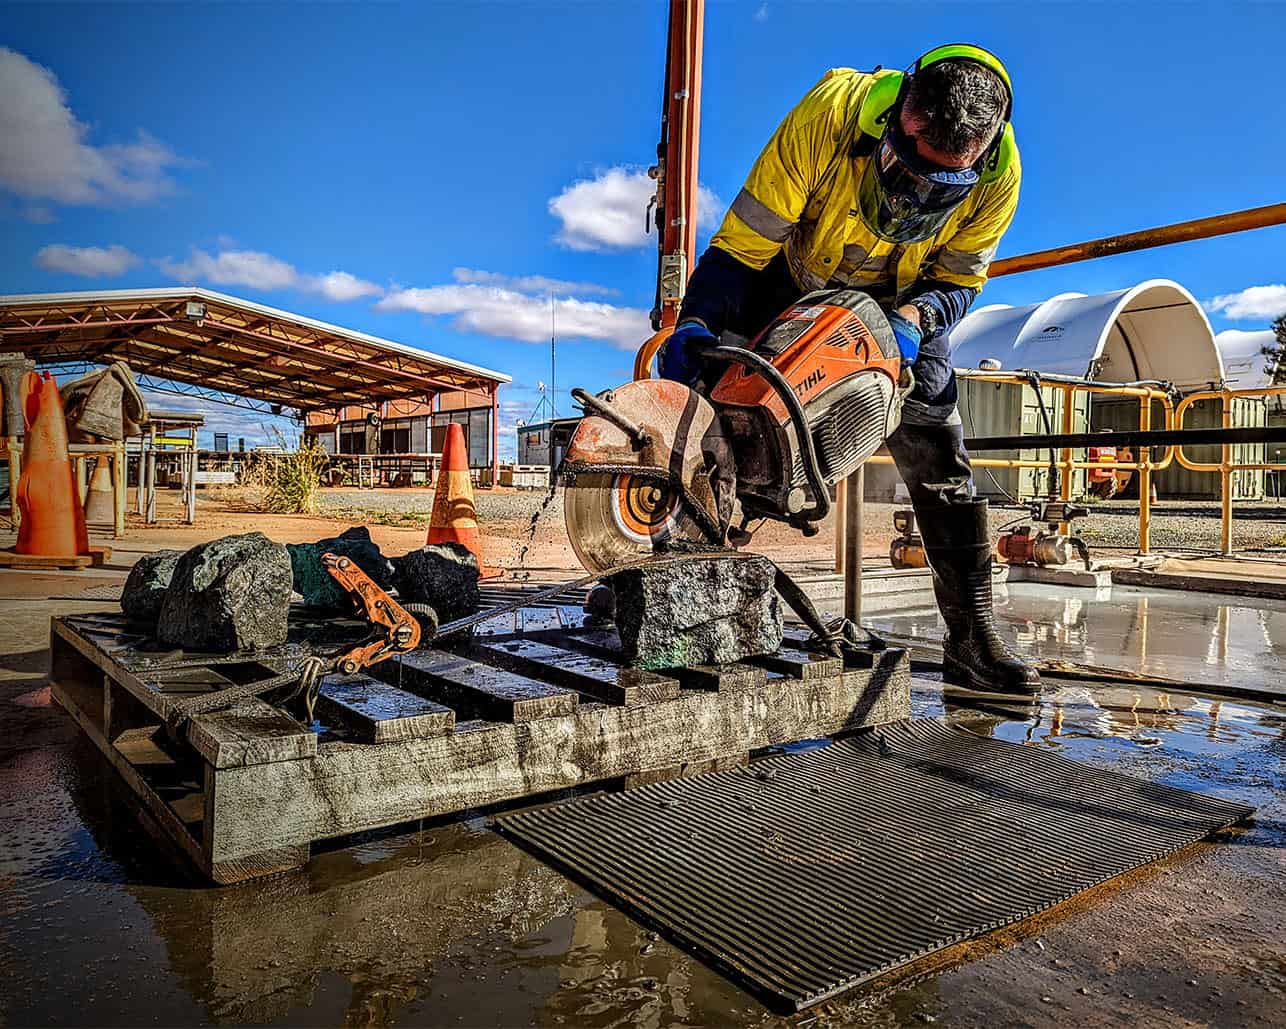
Turning rocks into spheres: occupational health and safety
 Working with copper ores that are not human-friendly required some adjustment in general work practices. When working with malachite:
– I wore a face mask. (later changed to respirators)
– I always did wet cutting.
– I wore eye and ear protection. (as standard practice)
– I wore appropriate clothing that was washed frequently.
Turning rocks into spheres: eco-friendly work practices
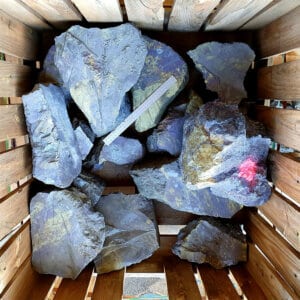
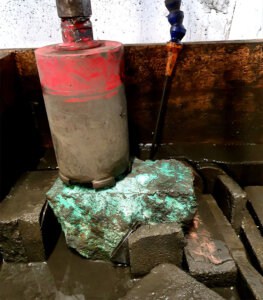
Once the bornite, chalcopyrite, chalcocite sulphide-rich ‘peacock ore’ arrived, I was in for a whole new set of different experiences. Now I had black, lightly acidic muck flying around the workshop and settling on the floor and containment barriers. The ‘Brickasaurus’ was a great help with this work. Used at exploration core yard sites, the ‘Brickasaurus’ is a portable water recycling unit that’s connected to the sawing equipment. We adapted it to the drill mill to supply a constant feed of water to the drilling surface. The residue and used water are collected and dropped by gravity into a separate section of the unit, while the ‘lighter’ water is returned for reuse.

We found this unit had the capacity to run for up to 10 working days straight before a cleanout was needed. As part of the work contract, all of this waste was returned to either the mine’s bio-remediation site or processing plant, at the mine’s expense. Our aim, and daily practice, was to produce as little cutting waste as possible. Any waste we made was saved from landfill or the waste-water system.
Turning rocks into spheres: mastering the drilling process for sulphide ore (peacock ore)
The drilling process for the rough boulders of sulphide ore, also known as ‘peacock ore,’ presented a new challenge compared to the smooth oxide zone material. I am hugely indebted to my brother, Ian, who showcased exceptional drilling skills during his five weeks of hard work here in the West. Other family members were innocently roped into the fray and for this I am forever grateful. These include Robyn, Trevor, Lisa, Craig and Tarrakyn. Thankyou everyone.
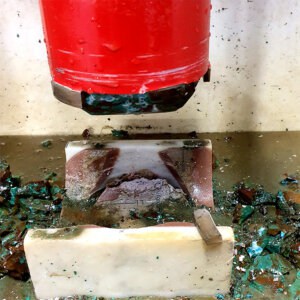
Our initial goal was to achieve a clean, defect-free cylinder measuring 85-100mm in length through the first ‘plunge drill cut’. Defects on the surface could jeopardize the viability of the 75mm sphere preform. Securing the irregular-shaped sulphide block into the box was a time-consuming task. Upon doing that, the operator used the X/Y table of the drill-mill, to assess whether it was possible to extract 2 or even 3 core pieces from the raw material.
Turning rocks into spheres: rotating, securing, and drilling
 Once the initial 300 plus cores were drilled, we then set each cylinder on its side and used the same drill bit for the second cut. Careful attention was paid to prevent any movement once the cylinder made contact with the core drill. To avoid breaking the drill ‘teeth’ or destroying the jig, we stopped the second cut halfway through the core piece. Clearing the drilling site of debris and swarf, we then rotated the cylinder 180 degrees to align it perfectly and drilled down to meet the initially drilled section. This marked the halfway point of the drilling sequence for the sphere preform.
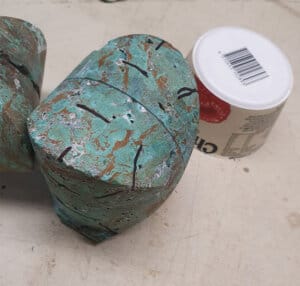
 To complete the drilling, the core was rotated from its previous position by 45 degrees, wedged to prevent any movement, and drilled in a similar way to the first half. The top was drilled, then the core was turned over and drilled again. Finally, we locked it in place via the jig to remove the sharp corners from the preform. All this awkward drilling left me with something that resembled a small lumpy pineapple.
As I repeated the drilling and resetting process for each preform, I pondered:
“How much longer would it take to grind them entirely by hand, or to set them up in a diamond saw jig to complete around 26 required cuts?”
Answer: “A much LONGER time!”
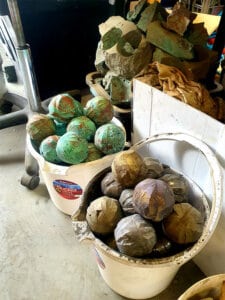
Turning rocks into spheres: refining preforms for the subsequent jig
 During these final three drilling processes, any preforms displaying prominent angularity due to misalignment of the core with the drill bit were carefully addressed. If misalignment or movement occurred during drilling, the affected sections were manually removed by hand using an 80-grit diamond grinding wheel. This ensured that the preform would fit seamlessly into the subsequent jig.
Turning rocks into spheres: high-speed sphere machines and preform shaping
 The High-Speed Sphere Machines (HSSM) manufactured by Highland Park were renowned for their robust construction and quality design to handle most preforms. Well-shaped preforms, achieved through manual shaping by hand on the 80-grit diamond wheel, were essential to optimise the lifespan of the three consumable diamond “work heads”.
The finer the diamond grit, the faster they wore out. With a range of 7 available grades (ranging from 80 to 8000 grit per cup diameter), I found that only 5 grades were necessary to achieve the desired final shape and polish for the various copper ores we worked with.
Turning rocks into spheres: achieving spherical perfection
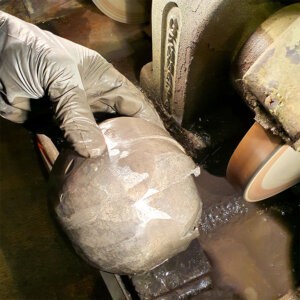
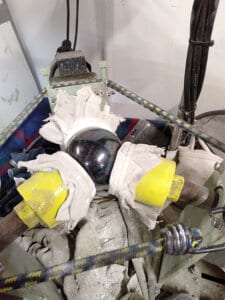
The initial set of 80-grit cups took on the demanding task of shaping the preforms into the desired spheroid form. It was noisy, dynamic work. I had to ensure the shape was completely spheroid to save time and reduce wear on the cups when attempting to rectify flat spots or deep grooves in the sphere. After many incidents and some mis-shapen preforms, it was evident that maintaining uniform pressure across all three cups of the HSSM machines was vital to guarantee that the mixed mineral spheres retained their perfect spheroidal form. Achieving this consistency was no easy feat! But with ample material for practice, I gradually honed my skills after working on over a hundred pieces.
Turning rocks into spheres: challenges and incidents during the 80 and 220-grit stages
The 80 and 220-grit stages of the process were particularly prone to critical incidents. Although glued halves only separated once, whole sections of weak material were pulverized on numerous occasions, and some segments occasionally dropped and fell onto the floor. There were also several times when a diamond segment went missing from one or more of the cups. (each has 5-7 segments per cup)
It was frustrating and often unsuccessful to retrieve diamond segments from the black, wet debris on the machine or the floor during a session. Having spare segments on hand became indispensable. Even losing just one segment from one of the cups out of the 15 used in the shaping process was enough to halt further work. Consequently, purchasing additional segment supplies for all grades and cup sizes became a necessary but costly investment in our production process.
Turning rocks into spheres: sphere re-assembly and infilling
 Partially broken spheres and retrieved pieces were carefully brought to the designated “recovery section” of the workbench for reassembly. In cases where gaps were present in the re-assembled spheres, we sourced matching material and pulverised it into a paste to infill the vacant areas. Once infilled, the entire sphere underwent stabilisation. However, this process was time-consuming and occasionally presented challenges.
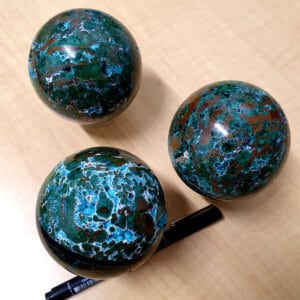
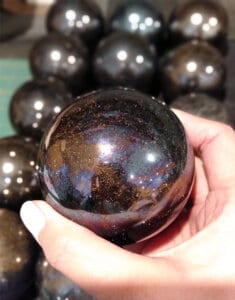
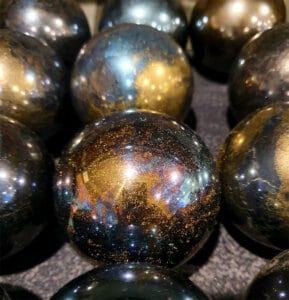
The real excitement began at the 400P stage. The 400P is the first of the diamond cups that have continuous rims of ceramic and diamond rather than diamond segments. The result is revelatory and very pleasing. It is at this stage that the true colours and patterning of the sphere are seen in all their glory and frequently stopped us to wonder in awe.
Turning rocks into spheres: polishing the spheres
After completing 13 stages of development, we can finally start the polishing stage. I used another Highland Park engineered 3-cup polishing unit. The ultrasonically cleaned spheres were carefully placed between the three cups, each packed with wadding and linen saturated in aluminium oxide.
As the sphere began moving between the polishing heads, I lightly dampened the aluminium oxide linen, adjusting the dampening level depending on the material being polished. The oxide material required more powder and a longer polishing time compared to the sulfide ores.
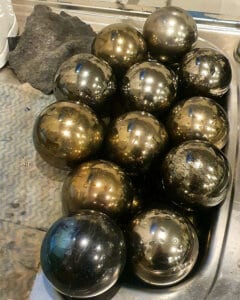
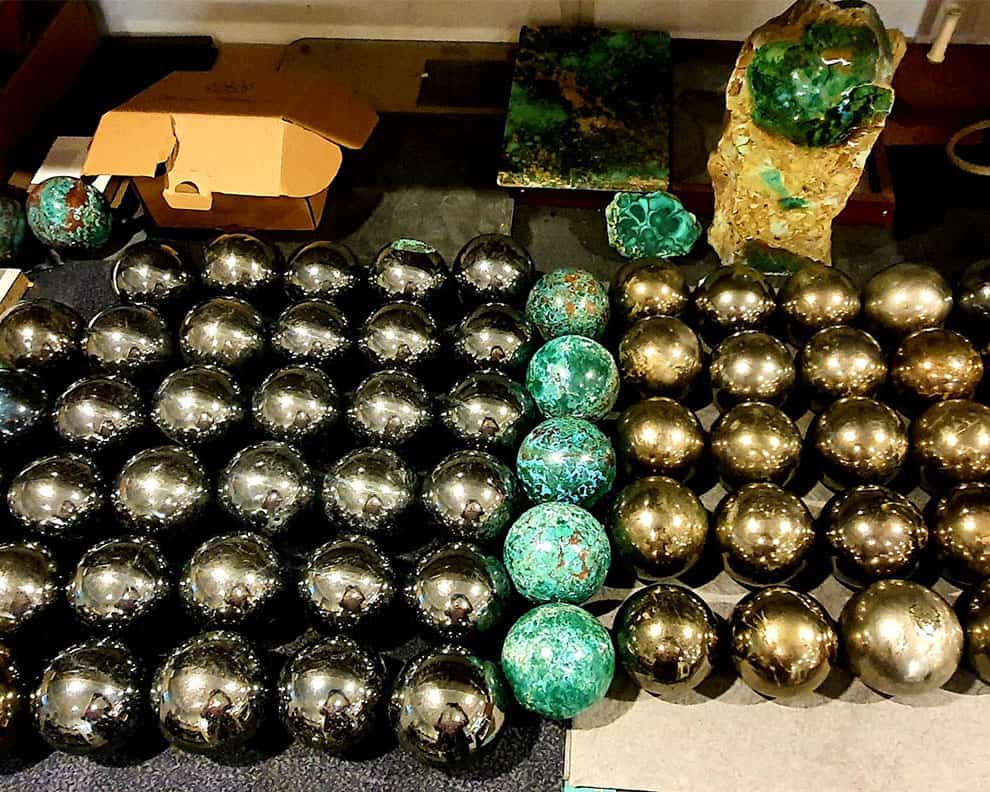
The softest ore, chalcocite, polished rapidly, resulting in stunning super-sized silver ball-bearing-like spheres with a flawless reflection. After polishing, the spheres were ultrasonically cleaned again to remove any residual polishing powder. They were then thoroughly rinsed and dried.
Turning rocks into spheres: completing the process and showcasing the spheres
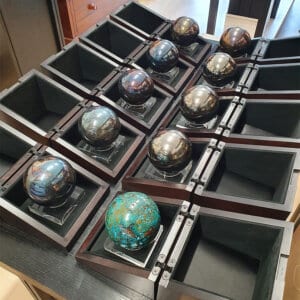
With one beautifully polished sphere completed, our attention turned to the remaining 329 spheres that awaited their turn. Additionally, we had 15 spheres measuring 125mm that required completion. Once finished, these spheres exhibited exceptional beauty and were beautifully packaged in their locally hand-crafted customised Sheoak boxes.
Mastering the art of shaping and polishing
The journey of transforming raw rocks into stunning spheres has been an exhilarating adventure, filled with challenges and triumphs. From unlocking the hidden beauty within the weathered slabs to managing increased demand and navigating supply chain hurdles, this project has pushed the boundaries of my artistry and innovation. The dedication and passion poured into every step of the process resulted in a collection of breathtaking spheres that now adorn the spaces of discerning collectors.
